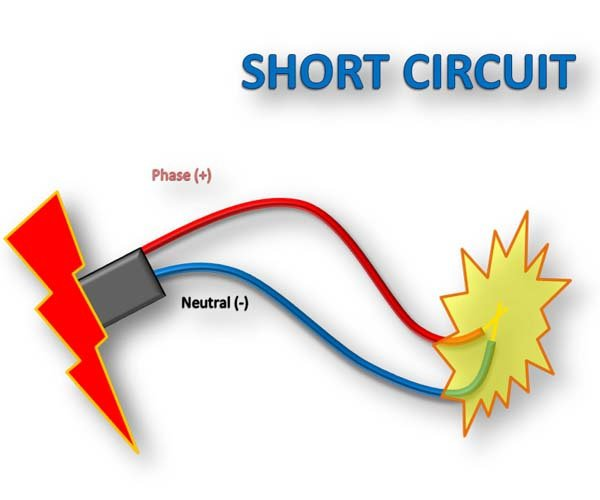
Short circuits can be a common occurrence in electrical systems, causing disruptions, damage to electrical devices, and even posing a safety hazard. Understanding how to detect a short circuit is essential for both homeowners and professionals alike. In this guide, we will explore the signs of a short circuit, how to use a multimeter to identify the source of the short, and how to fix a short circuit effectively.

Before we delve into the detection process, it's crucial to familiarize ourselves with the signs that indicate a short circuit. A short circuit occurs when electrical wires touch or when there is a breakdown in the insulation, causing an unintended flow of current. Here are a few common signs to look out for:
Tripped circuit breaker: If a circuit breaker trips frequently without any apparent reason, it could be a sign of a short circuit. Circuit breakers are designed to interrupt the electrical flow when a short circuit or overload occurs, protecting the electrical system from damage.
Blown fuses: Similar to a tripped circuit breaker, blown fuses can also be an indication of a short circuit. When an excessive amount of current flows through a circuit, the fuse blows to prevent overheating and potential fire hazards.
Sparks or smoke: When a short circuit occurs, it can generate sparks or even smoke at the point of the fault. If you notice any unusual electrical activity, such as sparks or smoke, it is essential to investigate further to determine if a short circuit is the cause.
Malfunctioning electrical devices: If your electrical devices are not functioning correctly or suddenly stop working, a short circuit may be to blame. The excessive current flow caused by a short circuit can damage sensitive components within these devices, rendering them inoperable.
To detect a short circuit, one of the most useful tools is a multimeter. Multimeters come with various features, but for short circuit detection, we will focus on the continuity mode. Here's a step-by-step guide on using a multimeter to identify the source of a short circuit:
Set your multimeter: Start by setting your multimeter to the continuity mode. This mode allows the multimeter to emit a beep or display a reading when there is continuity, indicating a connection between two points.
Turn off the power: Before proceeding, ensure that you turn off the power supply to the circuit you are testing. This step is crucial for your safety and the integrity of the electrical system.
Test for a short: Begin by disconnecting all electrical devices from the circuit you suspect has a short circuit. This step ensures that the multimeter readings are accurate and not affected by any connected devices.
Check the wires: With the power off and the devices disconnected, start by examining the electrical wires within the circuit. Look for any visible signs of damage, such as frayed insulation, exposed wires, or burnt marks. If you find any, it is likely the source of the short circuit.
Identify and fix: Once you have identified the section of the circuit with a potential short circuit, use the multimeter in continuity mode to test the continuity between various points. Touch the multimeter probes to different parts of the circuit, such as the hot wire and the neutral wire, or between the wires themselves. If the multimeter beeps or displays continuity, it indicates a short circuit.
Fix the short circuit: After locating the source of the short circuit, you have several options to fix it. If you find a broken wire, you can replace it with a new one. Alternatively, if you discover a faulty electrical device, repairing or replacing it may resolve the issue. If the short circuit is more complex or beyond your expertise, it is advisable to seek the assistance of a professional electrician.
Understanding the potential sources of short circuits can help prevent future occurrences. Here are a few common causes to be aware of:
Faulty electrical devices: Electrical devices that are defective or damaged can cause short circuits. Over time, internal components may degrade, leading to shorts in the circuitry.
Damaged electrical wires: Wires that are frayed, cracked, or chewed by rodents can result in a short circuit. It is essential to regularly inspect and maintain the integrity of electrical wires to minimize the risk of short circuits.
Overloaded circuits: Overloading a circuit by connecting too many electrical devices can generate excessive heat, leading to a short circuit. Be mindful of the wattage limits for each circuit and distribute the load evenly.
Improper wiring: Poorly installed or incorrect wiring can also contribute to short circuits. It is crucial to follow electrical codes and guidelines when installing or modifying electrical circuits to ensure safe and reliable operation.
Detecting a short circuit is crucial for the safety andproper functioning of electrical systems. By being aware of the signs of a short circuit and knowing how to use a multimeter to identify the source, you can take the necessary steps to fix the issue or seek professional assistance when needed. Remember to always prioritize safety by turning off the power before conducting any tests or repairs. Regular maintenance and inspection of electrical wires and devices can also help prevent short circuits from occurring in the first place. By staying vigilant and taking appropriate measures, you can ensure the smooth operation of your electrical circuits and protect your home from potential hazards.