Professional China PCB Assembly Online Services
When it comes to creating high-quality audio devices, the design of the speaker PCB (Printed Circuit Board) plays a crucial role. A well-designed speaker PCB ensures clear sound quality, efficient power use, and reliable performance. This guide will walk you through the essentials of designing a speaker PCB board, from understanding the basic components to practical design tips. Whether you're an audio enthusiast or an electronics engineer, this article will equip you with the knowledge needed to design a top-notch speaker PCB.

A speaker PCB board is the backbone of any audio device. It houses the electronic components that drive the speaker, ensuring that audio signals are amplified and transmitted accurately. Here are the primary elements you need to know:
Amplifier: This component boosts the audio signal to a level that can drive the speaker. Common amplifier ICs include the TPA3116 and LM386.
Power Supply: Provides the necessary power to the amplifier and other components. It can be a battery, USB power, or a dedicated power supply unit.
Audio Input: The source of the audio signal, which can be a 3.5mm jack, Bluetooth module, or other audio input interface.
Speaker Output: Connects to the speaker drivers, converting the amplified electrical signals into sound.
A well-designed speaker PCB ensures:
Clear Sound Quality: Minimizes noise and distortion.
Efficient Power Use: Reduces power loss and heat generation.
Reliability: Ensures long-term performance without failures.
Designing a speaker PCB board involves several steps, from planning to prototyping. Let's explore each step in detail.
Before you start designing, it's essential to define your requirements. Consider the following questions:
What is the power source? Determine if you'll use a battery, USB power, or another power source.
What is the desired output power? This will help you choose the right amplifier.
What are the size constraints? Ensure your design fits within the physical space available.
What type of audio input will you use? Decide if you'll use a wired input, Bluetooth, or another method.
Choosing the right components is crucial for a successful design. Here are the key components you'll need:
Amplifier IC: Choose an amplifier that meets your power and sound quality requirements. For example, the TPA3116 is a popular choice for its efficiency and sound quality.
Power Supply Components: Include capacitors, inductors, and voltage regulators to ensure a stable power supply.
Audio Input Interface: Depending on your requirements, choose a 3.5mm jack, Bluetooth module, or other input interface.
Passive Components: Such as resistors and capacitors for filtering and signal conditioning.
The schematic diagram is a blueprint of your PCB design. It shows how each component is connected. Here are some tips for creating an effective schematic:
Label All Components Clearly: Use descriptive names and values.
Group Related Components: Place components that work together close to each other.
Follow Standard Conventions: Use standard symbols and notation for components.
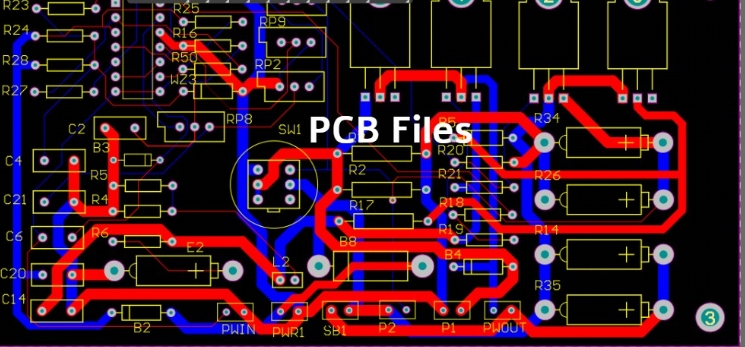
The PCB layout is where you translate your schematic into a physical design. A good layout ensures reliable performance and minimizes issues like noise and interference. Here are some best practices:
Component Placement: Place the amplifier and power components centrally to minimize trace lengths.
Ground Plane: Use a solid ground plane to reduce noise and provide a stable reference.
Trace Width: Ensure traces carrying high current are wide enough to handle the current without excessive heating.
Thermal Management: Provide adequate heat sinking for components that generate heat, such as the amplifier IC.
Routing: Keep power and ground traces short and wide. Avoid running sensitive signal traces near high-current traces.
After designing the PCB, the next step is to create a prototype and test it. Here are some tips for effective prototyping and testing:
Visual Inspection: Check for any obvious errors or shorts on the PCB.
Continuity Testing: Use a multimeter to check for continuity in the traces.
Power-Up Testing: Gradually apply power and monitor the output voltage and current.
Audio Testing: Test the audio output with different input signals to ensure clear sound quality.
If you encounter issues during testing, here are some common problems and their solutions:
No Output Sound: Check for shorts, open connections, and component orientation.
Distorted Sound: Ensure components are properly rated and check for noise sources.
Excessive Heat: Ensure components have adequate heat sinking and are not overloaded.
A speaker PCB board can be used in a wide range of applications. Here are a few examples:
Portable Speakers: Compact designs for battery-powered portable speakers.
Home Audio Systems: High-power designs for home audio systems.
Bluetooth Speakers: Integrated Bluetooth modules for wireless audio streaming.
DIY Audio Projects: Custom designs for hobbyists and makers.
A speaker PCB board is a printed circuit board that houses the electronic components needed to drive a speaker, including the amplifier, power supply, and audio input.
A well-designed speaker PCB ensures clear sound quality, efficient power use, and reliable performance, minimizing noise and distortion.
Key components include the amplifier IC, power supply components, audio input interface, and passive components like resistors and capacitors.
To ensure good sound quality, use a solid ground plane, keep power and ground traces short and wide, and place decoupling capacitors near the power pins of ICs.
If your speaker PCB is not working, check for shorts, open connections, and component orientation. Ensure components are properly rated and check for noise sources.
Yes, you can integrate a Bluetooth module with your speaker PCB to enable wireless audio streaming.
Designing a speaker PCB board is a rewarding and essential skill for anyone involved in audio electronics. By understanding the basics and following best practices in component selection, schematic design, PCB layout, and testing, you can create a reliable and high-quality speaker PCB for your projects. Whether you're building a portable speaker, a home audio system, or a DIY audio project, a well-designed speaker PCB will ensure your device delivers clear and powerful sound. Happy designing!